Set Up an Outlook Express E-Mail Account
The Internet Connection Wizard makes short work of setting up your online mailbox by walking you through each step for every e-mail account you set up.
1. Before you get going, make sure you know your email address along with the following information.
First, information about the e-mail servers:
- The type of e-mail server you use: POP3 (most e-mail accounts), HTTP (such as Hotmail), or IMAP
- The name of the incoming e-mail server for POB3 and IMAP (provided by your hosting company)
- The name of the outgoing e-mail server (generally SMTP) (provided by your hosting company)
Second, information about your account:
- Your account name and password
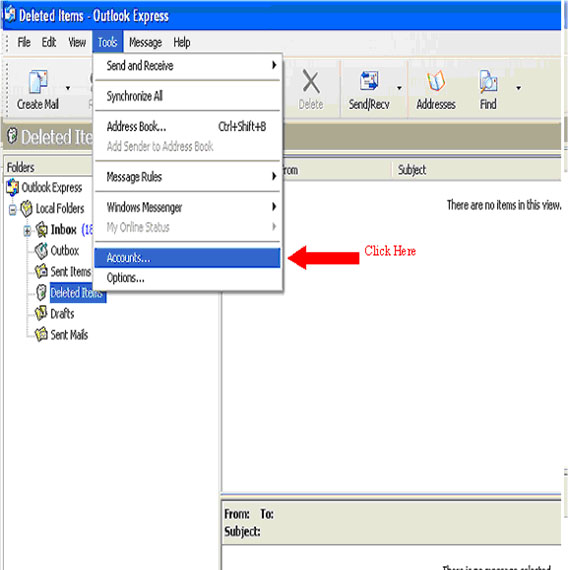
1. Start Outlook Express, and on the Tools menu, click Accounts.
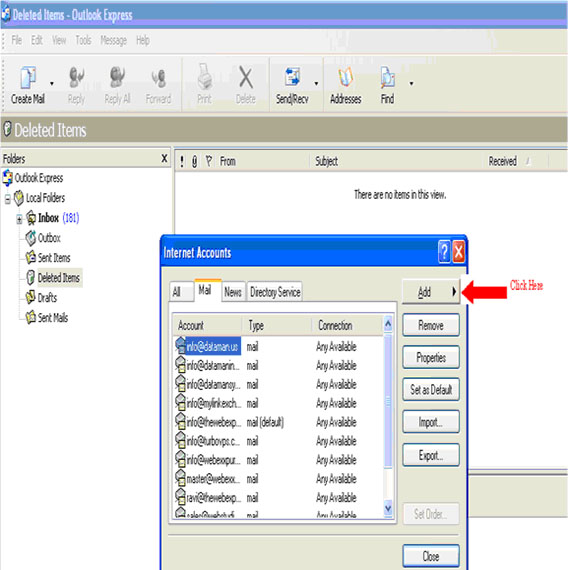
2. Click Add, and then click Mail to open the Internet Connection Wizard. Mail option from the Add button
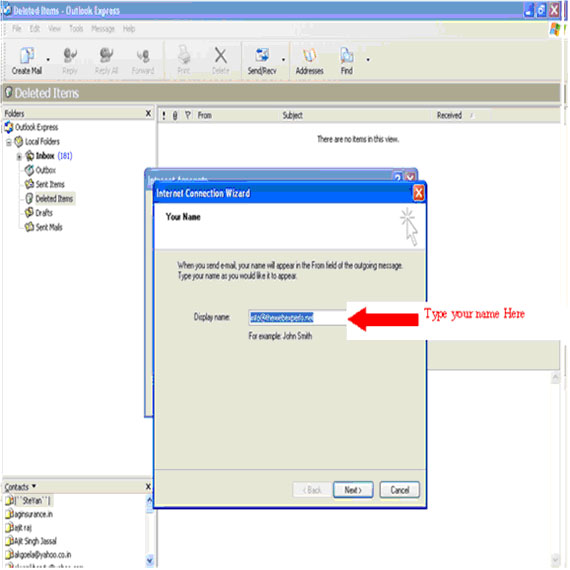
3. On the Your Name page of the wizard, type your name as you want it to appear to everyone who gets e-mail from you, and then click Next.
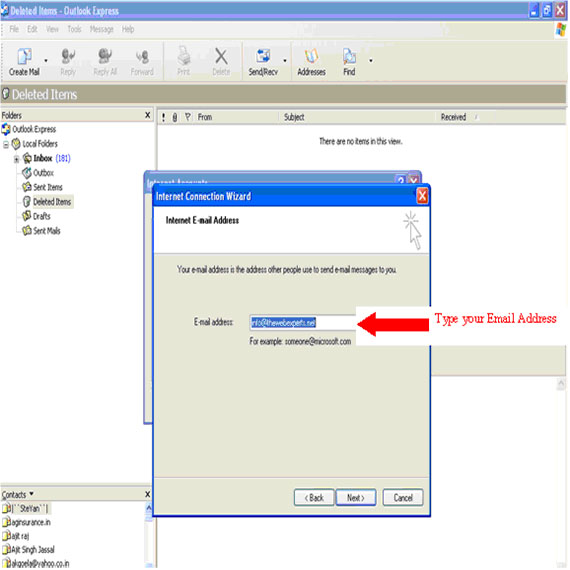
4. Now Type your email account and click on next.
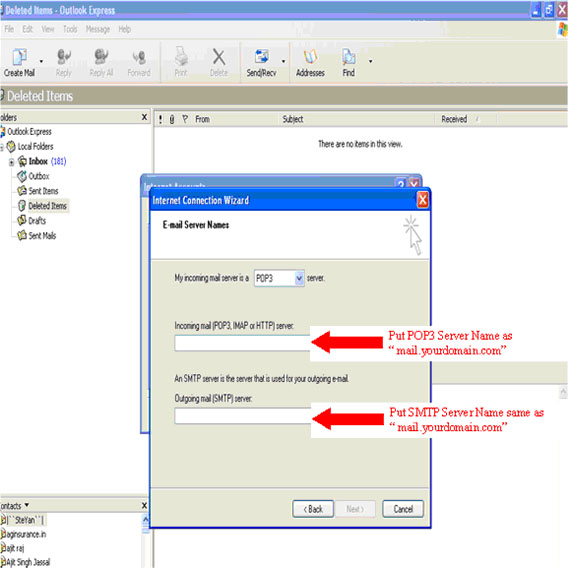
5. Put the name of incoming mail server & outgoing mail servers as provided by your hosting company
- incoming mail (POP3, IMAP or HTTP) = mail.yourdomain.com
- outgoing mail (SMTP) = mail.yourdomain.com
*Note: For example if your domain name is "webexxpurts.com" then the mail server name for both incoming & outgoing will be "mail.webexxpurts.com"
After putting the mail server names click on next
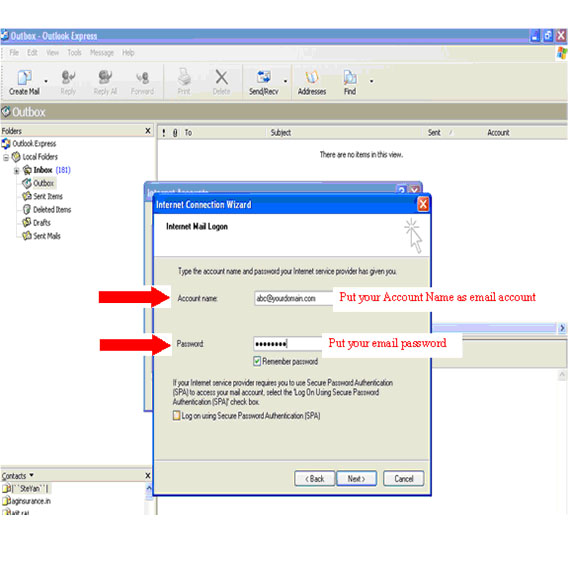
6. On the Internet Mail Logon page, type your account name and password. And also Click on remember password then click on next
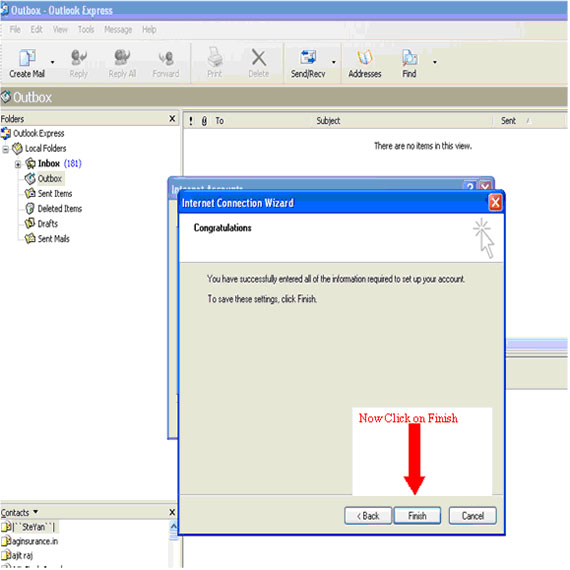
7. Now click on Finish button
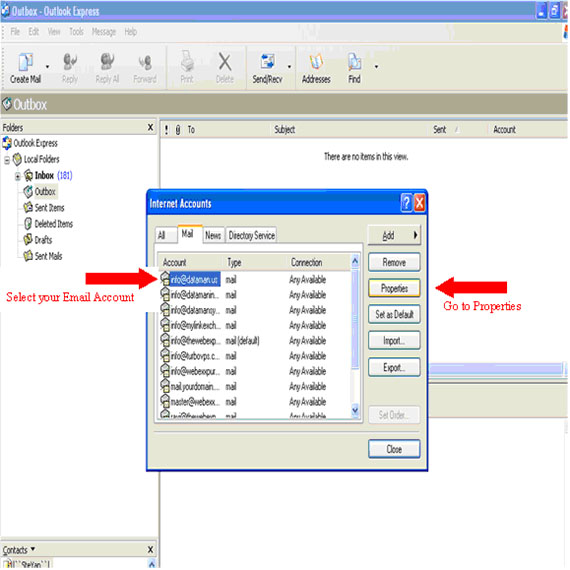
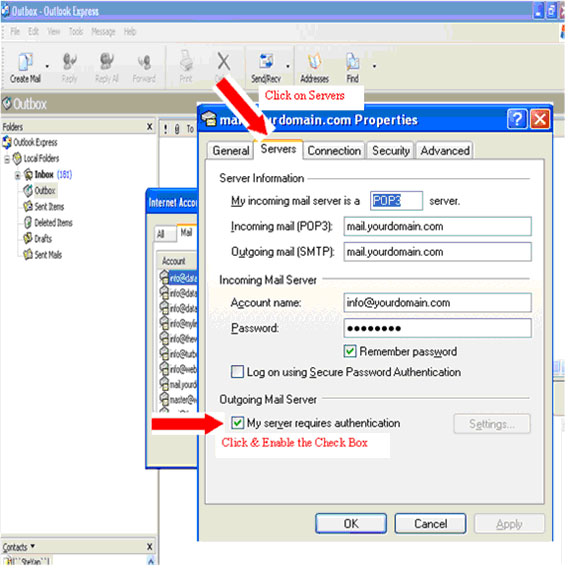
8. Now select the email account which u have created then go to its properties
9. Click on servers & enable the check box for My server requires authentication then click on advance
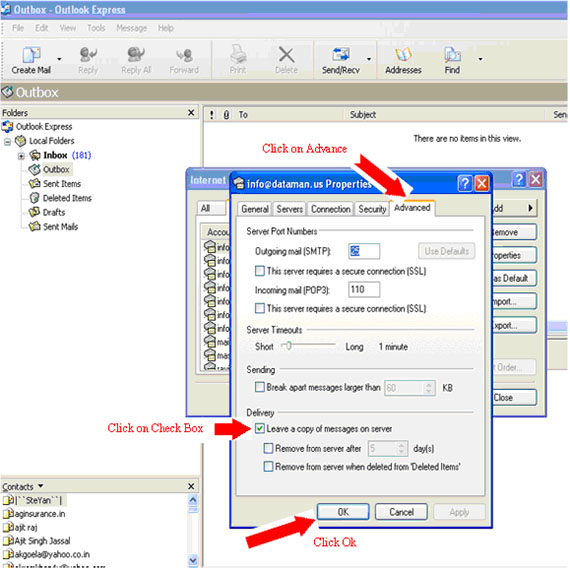
10. Now go to advance & enable the check box for "Leave a Copy of message on server" then click on OK
Now you ready to use your outlook express account
